BEWARE of the “Critical Language Period” Defense

At a D/HH conference this week, speakers were discussing the “Critical Language Development Period” during which language appears to develop naturally and with little effort by the child or family. To illustrate the urgency of capitalizing on this developmental period, the presenters included a dramatic graphic of a digital alarm clock. In bold red letters, the display on the clock blared: TOO LATE.

My hackles went up immediately. Too often I have heard professionals in Deaf Ed use the “critical period” as a reason for LOWERING EXPECTATIONS and DECREASING SERVICES for students who have passed whatever age is considered to be “the End” of that precious “Period”.  Consider an 8-year old child whose family chose for her to learn spoken language. The child’s teacher asks the SLP why there are no specific articulation or syntax goals in the IEP, and the SLP said, “She has passed the critical language period.”

NO!

These students have entered a “Period” in which they need MORE SERVICES and they need families and professionals to WORK HARDER, not give up. LANGUAGE practice is now more CRITICAL. PERIOD.

If a family has chosen spoken language for their child’s communication, I can offer guidance, options and research. But I cannot ignore the family’s choice. Period. My obligation is to do my best to provide that child with the best possible outcome, given the choice made by the family.

Because, maybe, regardless of what the research says, and what the theories propose, it really is true that “When you’ve seen one deaf child, you’ve seen one deaf child.”

power-walk

Why You Should Consider “I Don’t Know” as a Helpful Answer

I recently rewatched Rick Lavoie’s F.A.T. City video. If you haven’t seen it, I highly recommend you watch it — on a regular basis.

Among numerous bits of teaching wisdom he imparts, Lavoie advises teachers not to accept “I don’t know” as an answer because it gives students permission not to answer.

With respect to Mr. Lavoie, I haven’t noticed that effect in my classes over the years. At some point, I learned that “I don’t know” can be helpful to the teacher.

daffy-shrug

Teacher Challenge: Processing Time

One of the challenges of students who are deaf, using spoken language, is the need for more time to process language, including a teacher’s questions. Here’s a common exchange between teacher and student.

  1. Teacher asks a question.
  2. Teacher waits for student to respond.
  3. Teacher continues to wait, allowing extra time for student to process the question.
  4. Ultra-patient teacher restates the question and waits again.

This interaction can feel a lot like a game of chicken: each person waiting for the other to end the suspense.  It often ends with the student giving an incorrect answer and feeling defeated.


idkIf, after truly ‘looking for’ an answer,  students are allowed to respond with “I don’t know,” then the teacher can choose how to proceed with less and frustration and less time lost.

How do you feel about “I don’t know,” as a student response? 

P.S. Here is a link to the Rick Lavoie F.A.T. City video.


Belated Intervention: Beginning Vocabulary

INTRODUCING NEW VOCABULARY – FUN and PRACTICE

For many reasons, some children who are deaf don’t come to receive support in learning spoken language until they are school-aged. Intensive, structured instruction can lead these children to successful acquisition of spoken language.  I’ve seen it happen.

This post will discuss how a family member, teacher or therapist can plan, teach and practice vocabulary for children who need accelerated language learning.

Pile Of Words

Language begins with vocabulary.

Infants begin their language development by learning words – names for things and actions.  This is also where the older child needs to begin – by building a working vocabulary.

Quick note: To simplify pronoun choices, this post refers to Rina, who represents a child who is deaf. The name does not refer to any particular child, but was chosen by a random name generator. And ‘teacher’ is used to refer to anyone helping the child learn, whether at home, in therapy or at school.

Vocabulary can be practiced by topic, such as rooms of the house or daily routines.

Rina should be learning the names of the people, things and actions she encounters during her daily activities – emphasis on daily. Here are some basic principles.

  • Vocabulary units should first be home-based, such as rooms of the house; then school-based, such as items in the classroom.
  • Choose 8 to 15 words for each unit, depending on the child’s rate of learning.
  • Don’t forget verbs! She will need them to build sentences.
  • Children who are deaf often leave off the article of a noun (a, an, the). (We say it so quickly, Rina doesn’t hear it.) It is helpful to teach the article as part of the word.

Here are some examples for the bathroom.

Nouns: the water, the tub, a towel, some soap, the light, a hand, an arm, a leg, a foot.

Verbs: wash, turn-on (the water), dry

vocab-card

Children learn a word before they start using it.

The first sign that a child is learning a new word is that she can point to the picture of it when asked.

  1. First teach the word while looking at, pointing to the object, or, for verbs, doing the action. Find multiple examples of the word when possible (different lights around the home, washing various things, etc.)

2. When teaching a new word, repeat the word several times and require Rina to say it. Here’s how, Rina’s teacher introduces a new word.


“An arm. This is Rina’s arm. Say ‘arm’. One arm. Two arms. Rina has two arms.


3. Have the child show the object or action or point to it immediately after introducing it.

“Rina, show me an arm. Where is an arm? This is an arm! Is this an arm? Noooo! That’s a leg! Here’s an arm!”

Rina can’t yet point to her arm, so the caregiver does it for her, picking up Rina’s arm and shaking it playfully. This shows Rina what to do when she is asked to “Show an arm.” By also choosing a leg, Rina can begin to understand that an arm is a specific part of her body.

4. Make a picture card for each word. Consider taking photos showing the word that feature Rina. If you use clipart it should be realistic. Whatever you use, the picture should clearly represent the word.

It’s a good idea to post pictures of the vocabulary in the area where the words will be used most frequently. Pictures of ‘wash’, ‘hands’, ‘water’, ‘turn on’, and ‘soap’ can be posted above the bathroom sink appear while they are being learned. Writing the word on the picture helps build reading skills.

bathroom-bingoBINGO is a fun way to practice newly-learned words.

When Rina has learned a few words from her current unit, her family can play vocabulary BINGO using pictures instead of letters and numbers.  Use words from previous units to fill out your BINGO cards.

There are websites that create BINGO cards from your pictures. Or you can create a table in Microsoft Word and create your own in less than an hour.

Learning and practicing new vocabulary can be fun and rewarding for the entire family. 

Everyone, including the child, will feel proud as the list of familiar words grows longer and longer. And communication during daily routines will become easier and easier.


Cat_raising_hand_001YOUR TURN!

What vocabulary units do you suggest for an ‘older’ child who is just beginning to learn words? 

What games and gimmicks do you use to make language and vocabulary fun?

An Emergency Case of Catch-Up

With high quality support, students who are deaf can learn to use spoken language to communicate with anyone they choose.

That is the basis of this blog.

I think now I should be more specific and add: even with later-than ideal intervention.

For many reasons, some children who are deaf don’t come to receive support in learning spoken language until they are school-aged. These children are suffering from an emergency case of catch-up. So much language and vocabulary to learn and so many years lost.

1-case-of-catch-up


Meh. Forgive the bad visual pun.
I didn’t want to say ‘game’ of catch-up. It’s much too serious a topic for the flippant use of that term.


In my experience, children who begin a quality spoken language program at 11 years old can acquire language and speech that allows them to be successful communicators.

I believe this with all my heart –because I have seen it. And many others have witnessed these victories.

Yes, it’s true that not all children can make that achievement with a late start. But many can. And doesn’t that child – and that family –  in front of you deserve the chance to thrive?

There are so many topics on my “To Write” list. But this one is crying out to be aired. I am working on a series I’m calling Belated Intervention to discuss how these children can be supported and perhaps to highlight those who have succeeded.

Creating a November Experience

Students learn table-setting conventions and manners while practicing prepositions next to, between, above and below. You can also use to the left / right of.

Vocabulary targets include knife, fork, spoon, napkin, dinner plate, dessert, bowl, glass (drinking glass), set (Set the x next to the y), set the table, pass.

Oh – and they make a placemat that can be used for Part Two – Thanksgiving Foods!

placemat

Top left to right: dessert plate, glass, fork, dinner plate, napkin, knife and spoon. Insert appropriate prepositions!

Gather What You Need:

Paper, Pre-Cut Shapes, Bowls, Markers, Glue Sticks, Thanksgiving stickers (optional)

For placemats, I use 12 x 18 construction paper (the large size). Students choose orange, yellow, red or brown – autumn colors.  Of course, the kids glue each piece of the place setting onto the construction paper (glue stick b/c it will be laminated). But there’s so much more to the lesson than that.

Each of the pre-cut shapes above (except the name) is put into its own bowl; so that’s 7 bowls. The desks are put together like a dining room table around which students are seated. The bowls and glue sticks (fewer glue sticks than needed, to require students to ask for them to be passed) are scattered around the center of the table.

The Lesson

Predict Family Plans

I start by talking about what they think will happen at their family’s Thanksgiving celebration.

Experience has taught me that it’s helpful to get some information from the families   (names, relationships, etc.) before this discussion. Sadly, kids usually return from the holiday break talking about ‘boys’ and ‘girls’ whose names and relationships they don’t know. They don’t know where (whose house) they spent Thanksgiving. And they can’t name the foods that were served.

Where did you go for Thanksgiving? Who did you see? What did you eat?

tgiving-letter

I send this form home as homework on Monday the week of the lesson. It requires minimal effort because writing is limited. I often send it with a page of vocabulary pictures of the food items, depending on the family’s needs. Return rate for this paper has been as low as 0 for 4 kids. (sigh)


Discuss Manners

Next, we talk about manners. Manners are rules about being polite and are very important for special occasions. And Thanksgiving is one of the most special of all occasions!  Here are my basics.

manners

Review Manners + Vocabulary 

After reading ‘be ready to pass!”, I show my pre-made sample placemat and check everyone’s familiarity with the vocabulary.

We talk about “setting the table” and whose job that is. What are some other things you can do to help get ready for the meal?

We discuss where everything goes on the placemat. This is where we practice those prepositions.

Then I explain that, like we do at Thanksgiving dinner, we will pass each bowl around the table, right to left. (Teacher turns back to students, models right arm): Everyone raise your right arm!! (looking around) Other arm…   Now point to the left (demonstrate). — Or however you want to model right to left.

… and Action!

As happens at large family dinners, we always end up with ‘log jams’ as some take longer to get what they need.  And there are often a couple of kids who think it’s a race to see who  can pass the fastest. We deal with each event as it occurs, just as we do during a meal.

When everyone has what they need, they are ready to glue everything into place.We talk about “Ask, don’t reach,” and why it’s a good rule. Then discuss the ways to ask for something you want: “Please pass the milk – I mean glue.” “Could you pass the glue please?”

For kids with poor memory, I have written those sentences along with some vocabulary on the placemat, hoping that the family would also practice at home!

Add the Finishing Touches

Wrap it up as each child writes their name on their placemat. Add stickers if you’d like. Then review the manners and tell them that the following day you will add some food to your placemats!

This whole lesson will take about an hour, depending on how many students you have and how talkative they are, of course!


Extend this Experience

Practice food names and manners (“Please pass the peas”).

Create a representation of common Thanksgiving foods and fill your bowls. Be sure to make enough for seconds and/or leftovers if those are targets. Don’t forget butter and gravy for the mashed potatoes and corn! And be sure to include a dessert (with whipped cream). I’ve used a wide variety of simulations:

  • cut-out construction paper – gray turkey legs or turkey slices, white cloud-like mashed potatoes, hole-punch circle red cranberries or green peas, etc.
  • photos from grocery fliers or web image search – cut out and color copied
  • 3D (can’t laminate) – cotton or tissue paper mashed potatoes, red bead cranberries, etc.

You can practice additional language like, “Would you like…?”, “No thank you,”  “Do you like…?”, etc.

Remember to have fun!


Read More about Experience Stories and How to Use Them

The Power of Experience Stories

How to Use Experience Stories

An October Experience Story

(Easy) October Experience Story

Making a Halloween Monster Mobile!

An Experience Story is an excellent opportunity for repeated practice with selected language and vocabulary targets while maintaining the child’s interest and motivation. One big reason:The Child is the Main Character!

Read more about it! The Power of Experience Stories, How to Use Experience Stories, and Making a Mummy Doll Experience.


Expressive Language Targets

The book we used has two expressive language targets (what the child will say).

NOUN-VERB-NOUN   (We glued the paper)

NOUN-PREPOSITION-NOUN (paper on the cup)

book-3

Receptive Language Targets

The students for whom I planned this experience also practiced understanding and answering questions.  Notice that the answers to these questions would use the expressive targets.

                       Q: WHO?  A: N-V-N                             Q: WHERE?  A: N-prep-N

6-questions

Vocabulary Targets

Not all vocabulary practice is boring! Our kids need to know the names of popular (and literary Halloween characters.) So my students were instructed that their 3-monster mobile should include at least two of the following:

     a GHOST             FRANKENSTEIN             a JACK-O-LANTERN     

book-7

Students ‘label’ their monsters to practice the vocabulary. 


The Experience in Future Tense

These photos are PowerPoint slides used to practice future tense (with a high level of teacher support) on the day prior to the experience (making the project).  If your students aren’t ready to consider past-present-future, then skip this part of the lesson.

1-we-will-need

2-directions

3-directions

4-directions

The Heart of the Experience:  The Story Book

These photos show a  classroom version of the Experience Story Book. The Cover would highlight a photo of the class, each student holding his/her Monster Mobile and each student’s ‘signature’ on the by-lines.

Each page features

  • a photo taken during the Experience or an illustration of that moment( represented by the box)
  • text that includes a language or vocabulary target

book-1book-2book-3book-4book-5book-6book-7


Do Deaf Kids Need to Hear Their Classmates Comments?

You are guiding a discussion about the results of a science experiment investigating the effects of gravity on the growth of plant roots. In all cases, the roots of the seeds grew downward. Students are offering responses about why this might have happened.

The student in your class who is deaf hears you (through the FM) pose the question. “What are some reasons the roots might be growing downward?”

“The oo ahh  -ooee  or a oa ee a,” she hears one student suggest.

Another student answers, and she hears something like “a i something something something ou.”


It happens. Several times every day. I’ve experienced it.

I have observed students who are deaf participating in general education classes. They probably hear the teacher rather well. The teacher uses an FM and instinctively uses a louder-than-usual voice when addressing the class.

But students don’t use a louder voice. Many, many times, students use a softer-than-usual voice when speaking out in class. Sitting at the perimeter of the room,  I couldn’t understand what students said at this volume. I highly doubt that the student who is deaf understood them either.

passthemic

Students should use the FM microphone so the D/HH student has access to their answers, questions and comments.

Best Practices: Pass the FM microphone for student questions and comments.

When teachers develop the habit of sharing the FM microphone with students, the student who is D/HH has access to ALL spoken language in the classroom.

It may seem awkward at first, but it can quickly become a classroom expectation. When a soundfield FM is used, all students benefit from access to the shared microphone.

Ask your educational audiologist about the availability of a pass-around mic, which limits the noise associated with handling the mic. 

Repeating  student comments and questions can benefit many students.

Teachers are modeling good public speaking  skills when they repeat the comments and questions of ‘the audience.’ Teach this as a leadership skill and you will be contributing to the development of our next generation of audience-conscious speakers.

Other Strategies

Discuss with the D/HH student how he can let you know he didn’t hear or understand.

Self advocacy is an important skill for all learners and community members. In school, we learn to function as part of a cooperative group, but also need to advocate for our individual needs.

Students who are deaf need to know their own needs regarding communication and language. They also need to be aware of what the general public knows about their needs (answer: very little). They need to have specific language for explaining their needs. And the criteria for having those needs met.

Post prompts on the student’s desk.

 Could you repeat that, please?

I didn’t understand the question. 

Consider a private signal for students who can’t be encouraged to speak up. The signal will remind you to repeat what was just said.


Just like all students have the right to access the building where education takes place; so all students have the right to access all the information being presented. The student who is deaf or hard of hearing needs to know what classmates are contributing in addition to the teacher’s communication. 

October Experience Story: Making a Mummy Doll

OoooooOOOooooooooo

It’s the perfect time of year to learn about mummies and to make your own mummy. 

Here are directions with pictures and some language targets to make your planning easier. 


The Mummy-Making Experience

Thank you to GainingMommymentum Mandy for the Experience idea!

Here’s the finished product.

6-wrap-again-and-dry

Materials

a Barbie-type doll

cloth (cotton)

white school glue, like Elmers

plastic gloves (optional)

a craft paintbrush

scissors

a small plastic bowl

water

wax or parchment paper or plastic cover for your table


Directions

  1. Cut the doll’s hair as short as possible.1-get-a-doll
  2. Cut the cloth into strips about one inch wide.3-cut-strips
  3. Cover the table with wax paper or plastic.
  4. Mix well equal parts water and glue in the plastic bowl.2-glue-and-water
  5. Drag a cloth strip through the glue mixture. Then run it between your fingers to clear the extra glue.
  6. Wrap the strip around an arm of the doll, starting at the armpit and moving down the arm as you go. Repeat until arm is covered.
  7. Continue to wrap arms and legs of doll as described in step 6.4-wrap-legs
  8. Wrap head, shoulders and torso until doll is completely wrapped.5-and-rest-of-doll
  9. Use the paintbrush to spread the glue mixture evenly (just spread what’s already on the doll.) IF necessary, add glue mixture to any dry spots.

If you want to you, can stop here. To make a more realistic mummy, continue on with steps 10 and 11.

10. Drag more cloth strips through the glue mixture as before. Wrap the entire body of the doll, pinning its arms to its body and wrapping both legs together. Repeat step 9.6-wrap-again-and-dry

11. Allow doll to dry. Finished mummy should be hard!


The Language Possibilities!

Structured/Repetitive Language

Noun-verb-noun

Mommy cut the cloth. Susie wrapped the arm.

noun-around – noun

Wrap the cloth around the ____ arm, leg, other arm, other leg, body, head.

possessive ‘s

Wrap the mummy’s _____. Hold the mummy’s ____.  Put glue on the mummy’s ____ .

‘its’ 3rd person neutral possessive (not it’s as in it is.)

Cut its hair. Its hair is long. Its hair is short. Wrap its arms. etc.


Special Cases of Language

Questions  Questions can be practiced two ways: the child ANSWERS the question or the child ASKS the question.

The child should be able to answer the question before she asks it.  To answer the question, she must be able to understand it.

For an experience story, you can make the question your text in the book, and when reading the book, the child answers the question. 

*Who ____ed? Who wrapped the ____?*

Who cut the hair? Who wrapped the first arm? the other arm? the leg? the other leg? O the tummy? the head? Who wrapped the mummy again?


until

Until is a higher language structure that kids don’t pick up naturally, but try to use in many different contexts.

One way she will be excited to use until     ___ days until Halloween.

In this activity, you can say things like “Wrap the arm until it is covered” might be a target for your child in this activity. “Let it set until it dry” is another.


mummies-by-aliki

While diving into the Mummy-making experience, here’s a Reading Rainbow selection that you can use to talk about the real mummies of Egypt. Aliki’s text uses simple language, but a discussion of the afterlife can be a tough one for language learners. I think you’ll bring this book out year after year, having ever more informative discussions about Egypt and its mummies.

Image

How to Use Experience Stories

Experience stories are a fun and easy way to practice language. They can be created and enjoyed both at home and school and are helpful for any child with language goals. 

WHAT IS AN EXPERIENCE STORY?

An experience story begins as an activity that an adult shares with a child. After the activity, a story is created, targeting language that the child needs to practice. The result is a homemade book that includes photos taken during the activity and the child is the main character. It is read together often, providing repeated practice with the target language.

ziploc-book

STEP ONE: PRE-PLAN

Of course, you should start by deciding what your activity will be and what language you will target.

You might have an activity in mind (baking cupcakes for the cat’s birthday, washing dishes, a craft project – almost anything will do.)  If not, there are plenty of places to find activities online.

To plan the language you will target, imagine you and your child actually doing each step of the activity. What language can you practice when you look at the photos and discuss it afterward?

Plan the sentences you can use in your book. That way, you’ll know when to take pictures during the activity. How many sentences you plan (or actually use) will depend on your child’s language level and ability to sit with a book. 

Here are some examples for A Chocolate Milk Experience.

  • noun-verb-noun (Mommy opened the milk. Susie poured the milk. Mommy squeezed the chocolate. Susie stirred the milk. Mommy and Susie drank the chocolate milk. milkYum!)
  • noun-preposition-noun (We put the glasses on the table. We put the milk on the table. Mommy poured the milk in the glass. Susie squeezed the chocolate in the glass. Mommy and Susie stirred the milk in the glass. The milk is in our chocolatetummies. Yum!)


STEP TWO:

PARTNER PLAN, USING FUTURE TENSE

As mentioned, Experience Books can practice all verb tenses. When the adult and child plan the activity together, they use the future tense to discuss what they will do.

If your language target includes a verb, this is where your child will practice using future tense. If there is no verb target, you can use this step to expose her to future tense — she will hear it, but isn’t expected to understand or repeat it. 

You’ll need something physical on hand to talk about. This can be a finished example of what you’re making, a photo of what you’ll make, the written instructions (with illustrations) for your activity or all the items you’ll use in your activity.

Your goal is to have your child produce all of your target sentences in future tense. Here are some examples for our Chocolate Milk Experience. The language targets are underlined. These are the words we want the child to say at the very least.

  • noun-verb-noun (Mommy will open the milk. Susie (I) will pour the milk. Mommy will squeeze the chocolate. Susie (I) will stir the milk. We will drink the chocolate milk. Yum!)
  • preposition-noun ( Susie (I) will put the milk on the table.Mommy will pour the milk in the glass. Mommy will squeeze the chocolate in the glass. Susie (I) will stir the milk in the glass. We will drink the milk. Chocolate milk will be in our tummies. Yum!)

bordens-kids-choc-milk

STEP THREE:

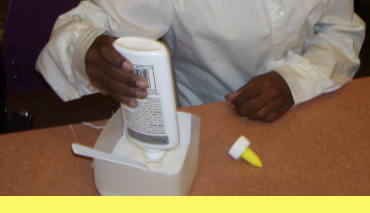
EXPERIENCE THE EXPERIENCE

There are two important things you need to accomplish during the experience.

  1. Have FUN!
  2. Take pictures

FUN:   The fun will keep the child motivated for future experiences. We certainly don’t want a language experience to become a time when the child feels the pressure of saying everything exactly the way you want it said.

While one of the benefits of Experience Stories is practicing all verb tenses around one experience, I suggest that present tense not be practiced during the first experience. During the first couple experiences, the child will be learning how the process works. She’ll be listening, following directions, using tools and so much more. Delaying the fun of pouring stuff into a bowl until the language is produced might be too much. But when some of those participation skills have been developed, the child should be expected to imitate the language that you planned in Step One. 

For every experience, from the very beginning, the adult should be narrating the activity, using the present tense and highlighting any new vocabulary. The child should repeat the adult’s language, including as many words as possible, in the correct order, with her best possible speech. You can try to correct or improve her language, but if three attempts don’t achieve that goal, then model the correct language once more and go back to having fun. 

Here’s the present tense noun-verb-noun language for the Chocolate Milk Experience. (Great name for a band!)

Mommy is opening the milk. I am pouring the milk. Mommy is squeezing the chocolate. I am stirring the milk. We are drinking the chocolate milk.
Yum!)

While this can be an opportunity to practice present tense, the most beneficial language practice comes with the book. The experience itself is the memory upon which the language is built.

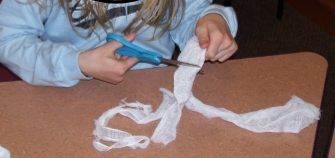
TAKING PICTURES:     During the experience, pause for a few candid and a few posed pictures. Your child can see the picture and use the present tense sentence again. The pictures are for your Experience Book. It’s what makes the book personal and supports comprehension of the language. But fear not. If you were so caught up in the fun of the experience that you forget to snap a shot for each of your target sentences, you can always ‘stage’ the shots in a re-enactment.  Or make your drawings to evoke the memories.

Remember: the experience must always be  fun.
exp-book-on-rings

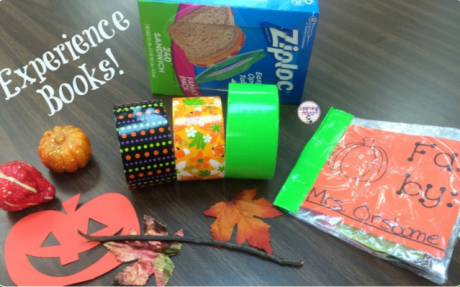
STEP FOUR: CREATE THE EXPERIENCE BOOK

The materials you use to create the book are up to you. You can tape the pictures into an everyday notebook that holds several experience stories. You can print it out on the computer and staple it. (Tape over the backs of the staples to prevent scratches.)  Use a photo album or brag book.  Use Ziploc bags and duct tape. A hole punch, index cards and ring. 

I like to have the child’s handwriting on each page. A good way to start is to have her write her name and names of family members every time they appear. Provide the traditional primary lines to encourage good penmanship.

Books based on true experiences should be written in past tense – because the experience happened in the past. This reinforces the meaning and usage of past tense, which can be challenging for kids who are deaf.

Here’s the final  noun-verb-noun version of the Chocolate Milk Experience

Mommy opened the milk. Susie poured the milk. Mommy squeezed the chocolate. Susie stirred the milk. Susie and Mommy drank the chocolate milk.
Yum!)

photo-album


A topical non-fiction book, while not really an “experience story,” can still repeat the same language. This one repeats the pattern “Do (chipmunks) have spots? No! (chipmunks) have stripes!” to practice present tense for plural verbs and “Do” questions.


STEP FIVE: USING THE BOOK TO PRACTICE LANGUAGEbook-love

The Prime Directive:

Experiences & Experience Books Must Always be FUN.

This promotes the enjoyment 

of more experience stories,

love for language and love for books.

  • First readings should be about becoming familiar with the book, appreciating the pictures and remembering the experience.
  • When the book itself is familiar, the purpose becomes to practice language. Repetitive reading of the book will promote language learning. 
  • When the language is more familiar to the child, use post-it notes to cover the target language (for example,  the preposition) to require the child to think about what word belongs there.
  • Ask questions that require the child to use the target language in her answer. For example, “Who poured the milk?” to have her answer, “Mommy poured the milk.” “What did you squeeze?” “I squeezed the chocolate.”
  • When pronouns are a language target, change the names in the book to pronouns when reading it. For example the child and the child’s activity partner say “I” and “you” to replace their own names. For others’ names, they use “he” and “she.”
  •  For beginning readers, have the child point to certain words
  •  To practice listening and auditory comprehension, the adult says a sentence from the book and child finds the picture for that sentence. Have her repeat the sentence back to you for extra language practice.

SHARE THE BOOK

Some suggestions:

  • Share the book with extended family, babysitters and teachers. They help promote carryover of the language into their time with your child. 
  • It can be fun to put an extra page at the end and have others write comments about the story. 
  • Keep your Experience Books as a collection and a memory of fun activities and language growth. When language or vocabulary from a previous activity needs to be reviewed, you can read that book again. Or read it again just for fun!

I’d love to hear about your favorite experience stories

and other ways you use Experience Books. 

passthemic


The Power of Experience Stories

(Note: If you’re already sold on Experience Stories, watch for suggestions for using them to practice language, vocabulary, auditory skills, reading and more. Coming Soon!)

ziploc-book


Experience stories are a fun and easy way to practice language. They can be created and enjoyed both at home and school and are helpful for any child with language goals. 


WHAT IS AN EXPERIENCE STORY?  An experience story begins as an activity that an adult shares with a child. After the activity, a story is created, targeting language that the child needs to practice. The story includes photos taken during the activity and the child is the main character. It is read together often, providing repeated practice with the target language.

The benefits of these personalized books are many.

  • The adult can control the language and vocabulary that is used, or wait and see what the child attempts to say during the activity.

If the child needs repetitive, structured practice with language, experience stories can be a fun and motivating way to accomplish that. The parent, teacher or therapist can also use experience stories to expand the child’s language if the child has complex language or learns language more naturally .

  • A single language target can be practiced many times.

    Here are some examples for a Banana Split Experience Story targeting noun-preposition-noun. New vocabulary is in italics.

    The bananas were in the pantry. Anna put the bananas on the counter. The ice cream was in the freezer. Mom put the ice cream on the counter too. Anna put the banana in the bowl. Then mom put three scoops in the bowl. Anna squeezed chocolate on one scoop.Then Anna poured strawberry on scoop. Anna poured pineapple on the last scoop. Mom sprayed whipped cream in Anna’s mouth! Yum! Mom put whipped cream on three scoops. Anna put cherries on three scoops. Anna and mom made a banana split in the kitchen!

    banana-split

  • All verb tenses can be practiced around a single activity.

    Involving the child in planning the activity (making a shopping list, etc.) allows you to use future tense to talk about the activity. Present tense is used during the activity. Past tense is used in the book.

  • The child can practice the same lesson over and over without losing interest.

  • The book created after the experience can be enjoyed for months, and becomes a keepsake documenting the child’s language growth.

  • By sharing the book with extended family, babysitters and others, caregivers can carry the learning over into their time with the child.

  • The text in the book promotes literacy. The child is reading about an activity she participated in, so she is likely to have a better comprehension of what she reads than if it were a commercial book.

  • The book can be used to practice listening and auditory comprehension. The adult says a sentence from the book and the child finds the picture.

  • The book can be used to practice pronoun use. When reading, the reader replaces her own name with ‘I’. If reading with the activity partner, she replaces the partner’s name with ‘you’ etc.

A Thought about Language During the Experience

It’s important that the Experience itself is fun, motivating and natural as possible.

It is not at all natural, while pouring pineapple, to say, “I am pouring pineapple on the last scoop.” But what if Grandma is on speaker phone, participating in the activity from afar? The child can give a play by play . Or the activity can become a cooking show. Mom is the host and asks, “So, Miss Anna Banana, please tell us what you are doing with the pineapple.”  Dad could be in the living room and, on cue ask, “Anna, what’s happening now?” Be creative. Mix it up. Above all, keep it fun.